Monday, November 8, 2010

File Folder Fun. :o)

Rachel working on her Initial Digraphs and Matthew working on  Upper/Lowercase Alphabet recognition.

James working on his Initial Blends

This morning we got to work right away after breakfast. We have been doing lots of file folder games lately....the kids like them a lot more than the worksheets, especially for phonics. I am going to see if I can find some math file folders for Rachel and James....I could probably just make my own but wow that sounds like way too much work. I have two sets of file folder games, one set I had to cut out and glue to a file folder myself-very economical-but lots of work. The other set is already assembled-I just have to cut the game pieces out.


Have a great day!

Thursday, November 4, 2010

Unit Study: Sound


We started our unit on sound today. I decided to teach it to all three at the same time even though it's part of James grade three science curriculum. The kids loved it!
We worked on a little sound themed lab that I had purchased during the summer. It was very easy with lots of little experiments. The kids learned about vibrations, pitch, and volume. 
After we were finished in the school room, we went down stairs so we could do another experiment to illustrate pitch...the "water in the cups" thing. The kids loved playing music using the cups....and they LOVED the GREEN water! :o)


I had also found a cute little story book on sound that had some cute activities in it. So I read a few chapters of that and then we did the first activity-a straw flute. We only had small straws on hand so it was hard to tell the difference in pitch between the straws but it was still fun.  
I


Well that's about it for now. 
We are going to review what we learned and then I have a few more activities, including making our own instruments!


Have a great day!

Tuesday, October 19, 2010

Hand Made Crayons

Rachel is learning about colors for science this year. I was searching for fun stuff to do with colors and I found this great project. So much fun! You peel the paper off crayons, and then break them up and stick them in silicone shape trays. Then melt in the oven at 275c for about 25 minutes.  When you remove the trays be really careful not to shake the trays so the colors will stay swirled, otherwise the colors will mix and turn brownish. 
We bought our trays at Ikea, in four different shapes. The best shape to use is the heart shape. They are the easiest to remove and they don't break. All the fish tales and star "arms" broke off while trying to remove them from the trays. Not so fun. 


Crayons peeled, broken and ready to be melted. 
Perfectly melted crayons. It takes a couple of hours to completely cool before you can "pop" them out of their mold

As you can see, none of the fish tails survived and a lot of the star arms broke off.. :o(


 I just love how the hearts turned out, so adorable. :o)


By the way, sorry about the for formatting on this post, I have been having a terrible time inserting pics with the "improved" blogger! :o)


Thanks for stopping by, 
Nicole Bailey

Monday, October 4, 2010

Preschool Work


So this year I am teaching Matthew too. :o) He's very enthusiastic and easy to teach. 
We are basically just working on the alphabet and counting right now.  We have already started working on letter sounds as well. Matthew should start reading by December, and working on addition also.   

Matthew working on counting to ten

We purchased Wiki Stix for practicing Matthew's letters. He just loves using them. Rachel uses them too. 
Another activity we do with the wiki stix cards is match up the letter card to the giant alphabet mat in the school room. Matthew is getting really good at this, and really enjoys getting out of his desk and moving around. :o)

Wiki Stix are basically waxed pieces of yarn. So the "stix" are bendable and slightly sticky. I just LOVE this product! I am on the look out for the number set too!

We also have a few different magnetic book sets. Matthew is working on the alphabet one here.  He is working on his letter recognition.  
Anyways, those are a few activities that Matthew has been up too lately.

Monday, September 27, 2010

Afternoon Fall Walk


Today was a beautiful day so I decided we needed to take a walk after we finished our work. 
The kids grabbed a ziplock bag each and we headed out. Each child collected a whole bag of beautiful leaves. This is my favorite time of year. Fall. :o)
We are casually working on the seasons for Butterfly's grade one science requirement.  I am doing each season as they come and go, instead of just doing all the seasons together in one month. I think it will be more meaningful if they can physically see the differences between each season as they occur right before their eyes. 
When we got home we got busy right away on this craft, something I made up in my mind as we walked....easy peasy. :o)
The kids tore up pieces of brown cardstock to make the tree trunk and branches and then glued it to the blue background cardstock. They cut long strips of green cardstock and then made little cuts for the grass. 
Then they added their leaves. :o)


Butterfly's Creation

Puppy's Creation

Turtle's Creation
We also read one of my all time favorite fall books, we have had this book for a long time. I highly recommend it. It explains why the leaves fall off the tree. Very scientific, and the illustrations are very informative and pretty.

Thanks for stopping by,
Nicole

Wednesday, September 8, 2010

Leaf Print Art Project


Well we are well into our second homeschool week. I'm still so green behind the ears...listening to all sorts of different advice coming from all sorts of directions. It's getting confusing. There are so many different ways to approach this homeschool adventure. I seem to always be second guessing myself....I just feel like I only have one chance to do it right...and if I screw up the world will fall apart! lol. It doesn't sound very likely when I say it out loud! :oP

Anyways, yesterday afternoon we actually had time to squeeze in a fun art project. This project was one of the many that I have planned for the year.
I got the complete instructions from a work book I bought at costco. It's filled with fun art projects for all the different seasons and holidays. :o)

To make the leaf print you start by making a starch/flour dough. The dough becomes very smooth when you knead it for awhile. The kids loved this part. The spent quite a while kneading the dough. Then they rolled it out with a rolling pin. Earlier that day they had picked some green leaves from the trees, which they then used to imprint in the dough. It took a whole day to dry.....and as you will soon see Turtle's LARGE hand print one still needs to dry. :o)


The Crew!


Monkey's
Puppy's

Turtle's
Butterfly's


When Monkey came home from school we were still working on our projects so she made one too. :o)

Thanks for stopping by and have a great day!
Nicole M Bailey


Thursday, September 2, 2010

Official Second Day of School

Before I start my post I just want to explain something...:o)
Everyone in blog world seems to be using nick  names for their kids..so I'm going to jump on board.....for safety reasons. When I was pregnant with my babies, I named my kids after animals.
So my 15 year old girl is Giraffe (my daughter hates this.....her aunty named her)
            11 year old girl is Monkey
            8 year old boy is Turtle  (a turtle  as a baby.....a rabbit as an 8 year old!)
            6 year old girl is Butterfly
            4 year old boy is Puppy (forever my puppy)
So from now on I will refer to each of them using their animal names.

Well I was out the door this morning at 7:45am for Monkey's first day of traditional school. Yikes.....waking up, and being ready for the day before 7:30am was quite the hardship! But we did it! We were out the door by 7:45. :o)

We had our official first day of homeschool yesterday. I didn't sleep more than three hours the night before....so needless to say it was a rough day. Monkey,  really wanted to help out with HSing so even though I wasn't completely ready to start we did anyways.

Today was the first day we started with the Workbox system. Of course I read Sue's book front to back.....but ended up modifying her system a tad bit to suit our needs.
It worked out really well. Puppy LOVED it. He was the only one who finished all of his boxes. He loved completing a box and getting a new one, it was very satisfying for him.
Butterfly also enjoyed finishing a box and getting a new one.
Turtle......had a bit of difficulty. He only completed 2 1/2 boxes. And we worked from 11:00 until 3:30pm. There was a lot of crying. He hates doing the workbook pages, and three pages just happened to be in his first workbox and then three more in his third. He was okay with the sentence making game in the second workbox but he just really struggles with the workbook pages. Tomorrow I'm going to try and move the harder boxes toward the end of the day.

We worked so hard that we didn't even get to the fun stuff I had planned so that will be slotted in tomorrow.

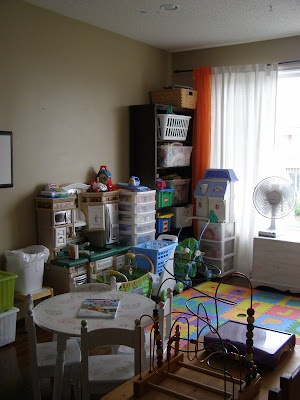
So here is how I set my workbox system.


I have 8 workboxes for Turtle and Butterfly and 7 for Puppy.
I borrowed the round tags from Mama Jenn
I have green tag numbers for Turtle, Pink for Butterfly and Blue for Puppy.
I made up a schedule grid in microsoft word. Each child has there own.
After school I'm going to fill the boxes for the following school day, while the kids are outside running around with the neighborhood children.
I'm going to place my tags on the boxes in numerical order.
Then go to my schedule grid and stick extra activity tags on the children's schedule in the order I want them to happen during the day. So I try and guess which box the kids will be working on around lunch time, for example, so I can place the lunch tag in that spot. The children will start with the first box. After completing a box they will remove the #1 tag from the box and stick it to the schedule and then put everything back into the box and replace the completed work and workbox on the shelf. The children will then take the next box, bring it back to their table and do the work from that box. Any extra supplies that they don't have in their pencil case will be included in the box.
Each child will keep their schedule on their table so they always know how much more work they need to complete before they are finished for the day.

Here are the kids schedule grids ready to go for tomorrow. 


I can already see that this system is going to provide us with the physical order we require. It's amazing how much work we ended up completing on the first day.....and the children generally worked very independently. Much more independent that in the past.

Want to see an example?
Here is Butterfly's grid schedule.
She has completed three boxes and it is now lunch time, after lunch she will complete three more boxes, have a snack and then two more boxes and then do some reading. And then she will be finished for the day.

Butterfly's Schedule Grid


Workboxes 1-3 are completed. We all can see that she still hasworkboxes 4-8 to complete. 


There is much more to our day than just the work boxes...I'll show you that on a different day.

Thanks for stopping by and God Bless you,
Nicole

Saturday, August 21, 2010

The Family's Response and Toy Room Side Pictures

So after I completely revamped the school room, I let my family see the final product. :oD
James, Rachel and Matthew had seen it already, they were with me while I hung all the bulletin boards, no need to relive that afternoon...there were a few cuss words.
But Molly hadn't seen it, nor daddy. Emily is sleeping over at nana's so she will have to wait.
Anyways, everyone is now really excited about the homeschool adventure we are now embarking on. Even daddy. He even requested that I slot him in once a month to teach a lesson, of course it will be his own lesson and I'm hoping it isn't an "evolutionary, question your faith" type lesson. I love my husband to pieces but please God answer my prayers and open Jason's heart to you-it would make my life a tad bit easier. :o)

Molly was very impressed with the Schoolroom....I could tell she kinda wished she was a younger kid again. I not only organized the school room side, but I also sorted through and organized the toy side-including the barbies. All the toys have a nice, happy comfortable home now.  Woody would be proud.

The school room shares it's space with the children's toys. This is the toy room side. Sorry about the poor quality pictures. I have no idea what's going on with my camera. I know the pictures are quite blurry-I'm going to see if I can fix that...also taking pictures in front of the window was tough so just bare with me. :o)


On the left side of the play room is the play kitchen and big "house" toys. The tall drawer cabinet to the right of the kitchen holds all the play food/dishes.
The doll house is perched on another drawer cabinet, it holds all of the play pieces that go with the doll house.  The kids can lift the house off and place it on the mat or on one of the tables to play with.
The tall bookshelf keeps dolls/doll clothes in one bin, a couple of lego bins, a bin for trains and tracks and a bin for littlest pet shop toys. Eventually I want to replace that book shelf with more white IKEA shelving and bins. LOVE those. :o)
The basket on the very top keeps all of our curriculum from last year-I need to sort thru it, I have books that I need to return to our school.


This is the bookshelf on the right side. This is where all of the little people stuff is neatly organized. The children can easily put all the pieces back when they are done playing with it. The kids haven't played with the little people stuff forever-the pieces were all over the house, I was completely ready to pack it all up and sell it. Now they play with it everyday. I'm also going to incorporate it into our grade one community social studies unit.


My shining glory.......The Barbie Cabinet!
I bought this cabinet when I was VERY pregnant with Matthew, four years ago. It's main purpose was to corral the Barbie stuff. I had a very tough time putting the thing together. It came in a giant box with a thousand small pieces and a 100 page instruction booklet! Even after two days of wrestling with it-it still wasn't right. The drawers and doors were always falling off and falling apart.
So needless to say-it wasn't serving it's purpose.
Until last week! I conquered it. :o) I used lots of carpenters glue and even dusted off my cabinet making clamps. Success.


All of the Barbie's, accessories and furniture have their own place now.
The kids and I even went through ALL the barbie stuff-located every shoe, hat, chair and handbag. We searched the whole house. And then I repaired all and any Barbie pieces that were broken and tossed any pieces beyond repair.
Success. :o)

On top of the cabinet I keep all of the children's games. Safe out of reach. You need special permission to play with games from now on.


So now James wants to learn in depth all the Canadian Provinces. Last May/June we did a unit study on Nova Scotia, the kids LOVED it. So I think I'm going to ditch the Alberta Social Studies Curriculum and focus on learning Canada, completely and thoroughly.

Thanks for stopping by,
Nicole

Friday, August 20, 2010

Organizing....


The magnetic white board is for teaching. 
The pouches below my white board are from IKEA, I keep all of our flash cards in the pouches. Easy to see, grab and return.

The fish bowl is for our 100 day count. We haven't started the year yet so there aren't any fish in the bowl yet. :o)
The cabinet keeps several resources, including reading rods, and the LR cash register-I can't wait to use it! The kids are going to LOVE it!


This cabinets keeps most of my resources and learning tools.  I'm so excited to start using these items-almost all of them are still sealed, never used. Can you believe I only found out about the Canadian Home Education Resources store a few months ago?? Last year we hardly had any tools/manipulatives, or resources. In fact I wouldn't have even spent a third of my $750.00 fund had I not found CHER before the end of last year.  My friend Tracey was like you BETTER send that fund!  But now I am ready.  I have everything I need. 

Some School Room Pictures


Welcome to our humble learning place, our school room. It's the bonus room above our garage.

This room used to be shared by my two oldest daughters, until last year when we moved Molly downstairs in the basement (very hard to do-but not regretted for a minute), and Emily in the room next store. The girl's bedroom was beach themed-hence the beach mural. I decided to keep it, it's actually quite cheery, especially during the winter months.
The dinning room table and chair set in the far back corner is for my eight year old son, James and myself, and for all four of us when we need to work together. 
The rectangle table front left is for my 4 year old son, Matthew and the round white table is for my six year old daughter, Rachel.


The shelves with white, green and pink bins corral all of our school supplies; paper, books, crayons, markers, coloring books, paint supplies-you get the idea. :o)
Almost all of the bins are labeled-the kids helped me label the bins. The odd ones that are not labeled-need to be. 

The tall cabinet and the short white cabinet house all of our homeschool manipulatives and resources. The long short cabinet with white and green bins keep the children's current school work-more on that later. By accident, I set up a "workbox" type system. Next post I'll show you exactly the system I came up with for us this year. I'm really excited about it. I've worked really hard the last four months to come up with system that would work for us. 


Anyways, that's a peek into our little homeschool. :o)

Thanks for stopping by,
Nicole

2nd post....:o)

So I guess this blog is turning out to be more of a diary than anything else.
I've spent the later morning to later afternoon working in the school room, hanging bulletin boards and white erase boards. Things are looking good. I wish I was a kid again...problem is James comes into the room and says "so can I go back to normal school?"
Which brings me to the question...why am I doing this?
I could be getting ready for a great year with just Matthew and I.....coffee dates and play dates galore. Freedom and peace and quiet all rolled into one.
So I ask myself again...why am I doing this?


1. I want my children to have the best education possible.
2. I want to be in control of the education of my children.
3. I want to have more influence over my children than the children they spend 8-9 hours a day with at school.
4. I want to create and maintain a good relationship with my children.
5. I want my children to be independent, unique children eager and capable of learning as much as possible.


Those are good reasons to homeschool aren't they?
They are my reasons after all.


First Post!

Hello.
Well I started this blog a year ago...and this is my first post. :o)
I was kinda side tracked with my stamping/card making blog last year-it was my little piece of me. Well after a belly flop of of year I decided that I needed to make some changes in order to succeed at homeschooling this year.
One change was scaling down "my" stuff. I was spending too much time working on my CTMH business and design cards. Did I just say that out loud?
I think I started using the design card thing as a direct outlet to my frustration over the "in my eyes" impending failure of a homeschool year.
I'm not saying that I was making cards when I should have been teaching James-but I was making cards/blog surfing when I should have been 1. sleeping 2. doing research on HS.
I did a lot of research before I jumped into the homeschool thing. I prayed on it and did research on it for 1.5 years. I did a lot of research but the one thing I missed was the homeschool blogs. I guess I just figured what would be the point if a homeschool blog?
Well, I quickly learned that blogs serve as an information, collaboration.
Blogs are an excellent way to learn about any topic.

So here I am now.
Going into my second year of homeschooling.
This is what I have learned:
1. Connect with other Homeschooling families. Support is crucial. Reaffirmation essential.
I was about to give up, and send James back to school for grade three. It was May and I had completely given up-I was burnt out and tired of struggling. I felt like a complete failure.
My husband and son had agreed that James should go back to school. I was about to give in....when I posted on a local board. Wow the support was unbelievable. I even received a phone call from a now friend. She saved me, and my little homeschool. :o)
Everything changed after that. I remembered why I started homeschooling in the first place. And decided that failure why not an option.

2. Get Organized, and stay organized. It's crucial for children (especially ones that have been in the school system) that you get and keep organized. Make a schedule and stick to it. One thing that was eating me alive last year was the guilt that we were falling behind. And we were falling behind.

3. Get lots of resources. For James in particular, he has relational vocabulary issues. He may even have a mild learning disorder. So he needs to be shown LOTS of different ways to learn some concepts. Like learning to count to 100 last year took forever. It was so frustrating, for the both of us. If I had known last year about all the awesome manipulatives available, for every subject-we would have had way more fun and a lot less frustration learning/teaching new things.
So after stocking my classroom with almost $1300 worth of new curriculum, manipulatives, flash cards, posters etc. I feel way more confident that we are going to have a good year.

4. Activities. Schedule at least two-three afternoons with activities. The kids need to be around other children, and they need to be doing fun stuff. So I signed all the kids up for gymnastics, homeschool gym class. I'm also considering signing the kids up for a full day of workshops through our homeschool association. And we are signing up for EVERY "homeschool days" even we can! :o)

Anyways, I have overhauled our classroom, organized all of our supplies/resources and curriculum. I am fine tuning my 2010/2011 school year plan and schedule.
I just have to hang my magnetic board and cork board. Then I will post pictures, because I know every blog surfers likes to look a pictures.


Thanks for stopping by,
Nicole